
How to Create Your Own “Apps” with Google Slides (FREE Template)
You may have heard me refer to Google Slides as the Swiss Army Knife of G Suite. It seems there is always a new way to use it in the classroom and go BEYOND using tools as digital substitutes.
In this guest post by Micah Shippee, you can learn How to Create Your Own “Apps” with Google Slides!

(Want to learn even more ways to go BEYOND the Tools, be sure to check out 7 Ways to Rethink Digital Assignments.)
Creating an “app” like experience using Google Slides is not only a fun idea for a school web app, as Michah Shippee shares below, but is also a super fun idea for students to CREATE their own “apps.”
Ask your students if they would like to create an app? What would they want it to do? What message would they want to send to the world?
I see this as a great “All About Me,” student project, or a way to present information to the class, PBL…the “apps” are endless!
Take this post to the next level and get your students creating!
Below are the step-by-step directions from Micah on how to create an app-like experience using Google Slides. He even shares his template!
How will you use this idea? Please share in the comments below.
Below is a guest post by Micah Shippee, a Google Certified Trainer from New York.
Create Your Own “Apps” With Google Slides
Many schools and classrooms would love to have their own app but the skills and/or cost of developing an app is often beyond our immediate reach.
Google Slides offers a clean solution to your app dilemma. Try out this example on a mobile device to see an example: bit.ly/slidesapp
The content can be easily adjusted and authoring privileges can be given to school groups like teachers, PTO, administrators, food services, etc.. to update certain portions of the web app.
This is a relatively simple solution to the School-Web-App-Dilemma.
You can start with this template: bit.ly/slidesappCOPYand change images and content as you wish or follow these simple steps to create your own.
Step 1: Create a new Google Slides presentation.
Step 2: Go to File >Page Setup
Step 3: Select Custom from the drop-down menu, and enter 8 x 11.5 inches (click OK)
Step 4: SLIDE ONE – add a school mascot or other homepage image and a “Click to Enter” shape to create the button. Be sure to title your slide deck as the name of your “app.”
Note: In iOS, the first slide will appear as the icon image, try playing around with different images to make a custom page icon on the mobile home screen.
Step 5: SLIDE TWO – Add a home screen slide with your table of contents with icons and labels.
Step 6: Add a slide for every item listed in your table of contents on SLIDE TWO, unless you plan to have these link to outside content, like an external website or document (like I did for the “School Calendar” button).
Be sure to add a “HOME” button on each page to return the user back to SLIDE TWO.
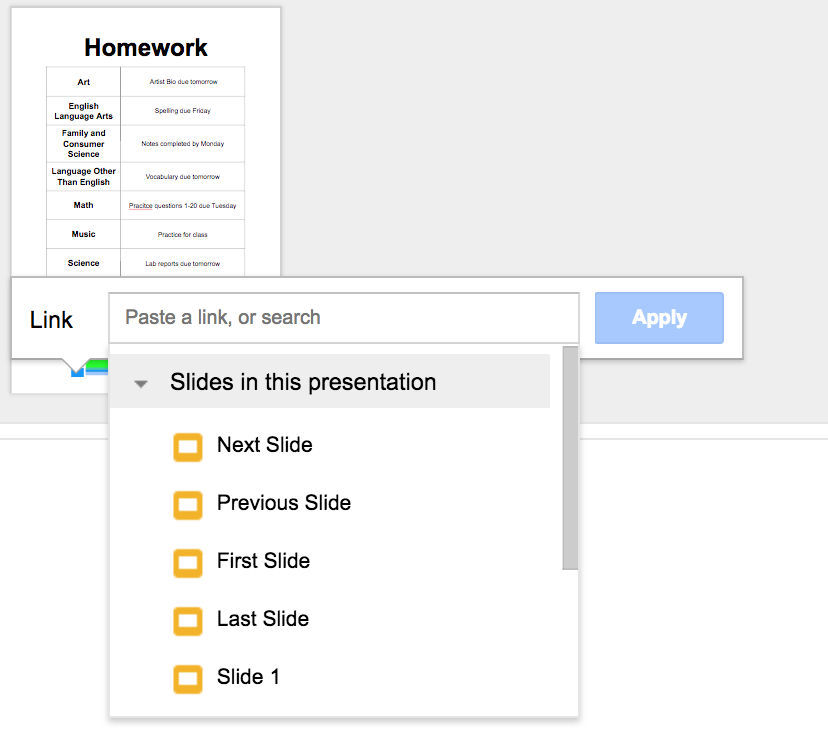
Step 7: Add your internal links (linking one slide to another). To do this, select your image/icon on your table of contents and insert a link (control+K). Instead of copying and pasting an external link, select the slide number from the drop-down like in the image below. Don’t forget to link the “HOME” button on each slide!
Step 8: After you have finished editing your slides and adding all of your links, click “SHARE” and make the link public (or limit within your school domain).

Step 9: Hack the shared page URL by selecting everything in the link from the word “edit” to the end.
Delete the selection and add the word “preview.” (See Kasey’s post for details on this little URL hack.)
This will force a full-screen preview of the shared slide deck and create a more app-like experience for the user.
Note: Alternatively, you could also use the “Publish to the Web,” feature of Google Slides.
- Go to File>Publish to the Web.
- Grab the unique, published link and use this instead of the preview link.
Step 10: Distribute the URL to users and instruct them to add a “Home Screen” button.
- iOS – Safari: enter address, select the share box, and select “Add to Home Screen.”
- Android – Chrome: enter address, click three dots, and select “Add to Home Screen.”
Notes for Web App Buttons and Icons: The Noun Project offers Creative Commons icons for free as long as you provide proper credit, use the embedded credit already in the icon you downloaded, or you can copy the attribution text and add it to your citations, about page, or place in which you would credit work you did not create.
No comments:
Post a Comment